· resources · 4 min read
Getting KeepTrack Running Locally
A beginner-friendly guide to installing and running KeepTrack on your local machine, including all the prerequisites and tools you'll need to get started with this powerful space tracking platform.

Ever wanted to run your own version of KeepTrack? Maybe you’re interested in contributing to the project, or perhaps you just want to tinker with the code and see how this space tracking platform works under the hood. Whatever your reasons, I’ve put together this straightforward guide to get you up and running with a local version of KeepTrack in no time.
Prerequisites: What You’ll Need
Before we dive in, let’s make sure you have all the necessary tools. You’ll need:
- Node.js - I’m using version 23.5.0, but any recent version should work
- Git - For cloning the repository
- NPM - For managing packages (comes with Node.js)
- A code editor - I recommend VSCode for the best experience
Don’t have these installed yet? No worries! Let’s quickly go through setting them up.
Installing the Tools
Node.js and NPM
Head over to Node.js official website and download the LTS (Long Term Support) version. The installer will include NPM automatically.
After installation, verify everything’s working by opening your command prompt or terminal and typing:
node --version
npm --version
You should see version numbers displayed for both.
Git
Download and install Git from the Git official website.
To check if Git was installed correctly, open your command prompt or terminal and type:
git --versionVSCode (Recommended)
While you can use any code editor you’re comfortable with, VSCode offers excellent TypeScript support and integration with Node.js projects. Download it from the Visual Studio Code website.
Cloning and Setting Up KeepTrack
Now that we have our tools ready, let’s get KeepTrack set up on your machine:
-
Open your command prompt or terminal
-
Navigate to where you want to store the project
cd Documents/Projects # Or wherever you prefer -
Clone the repository
git clone https://github.com/thkruz/keeptrack.space.git -
Navigate into the project folder
cd keeptrack.space -
Install dependencies
npm installThis might take a few minutes as it downloads all the necessary packages.
Running KeepTrack Locally
Now comes the fun part—getting KeepTrack up and running on your machine!
Open the project in VSCode
Open VSCode manually and use File > Open Folder to navigate to your keeptrack.space folder.
Alternatively, if you’re on Linux or macOS and have the VSCode command-line tool installed, you can open the folder directly from the terminal by running:
code . # Opens the current folder in VSCodeStart the TypeScript compiler in watch mode
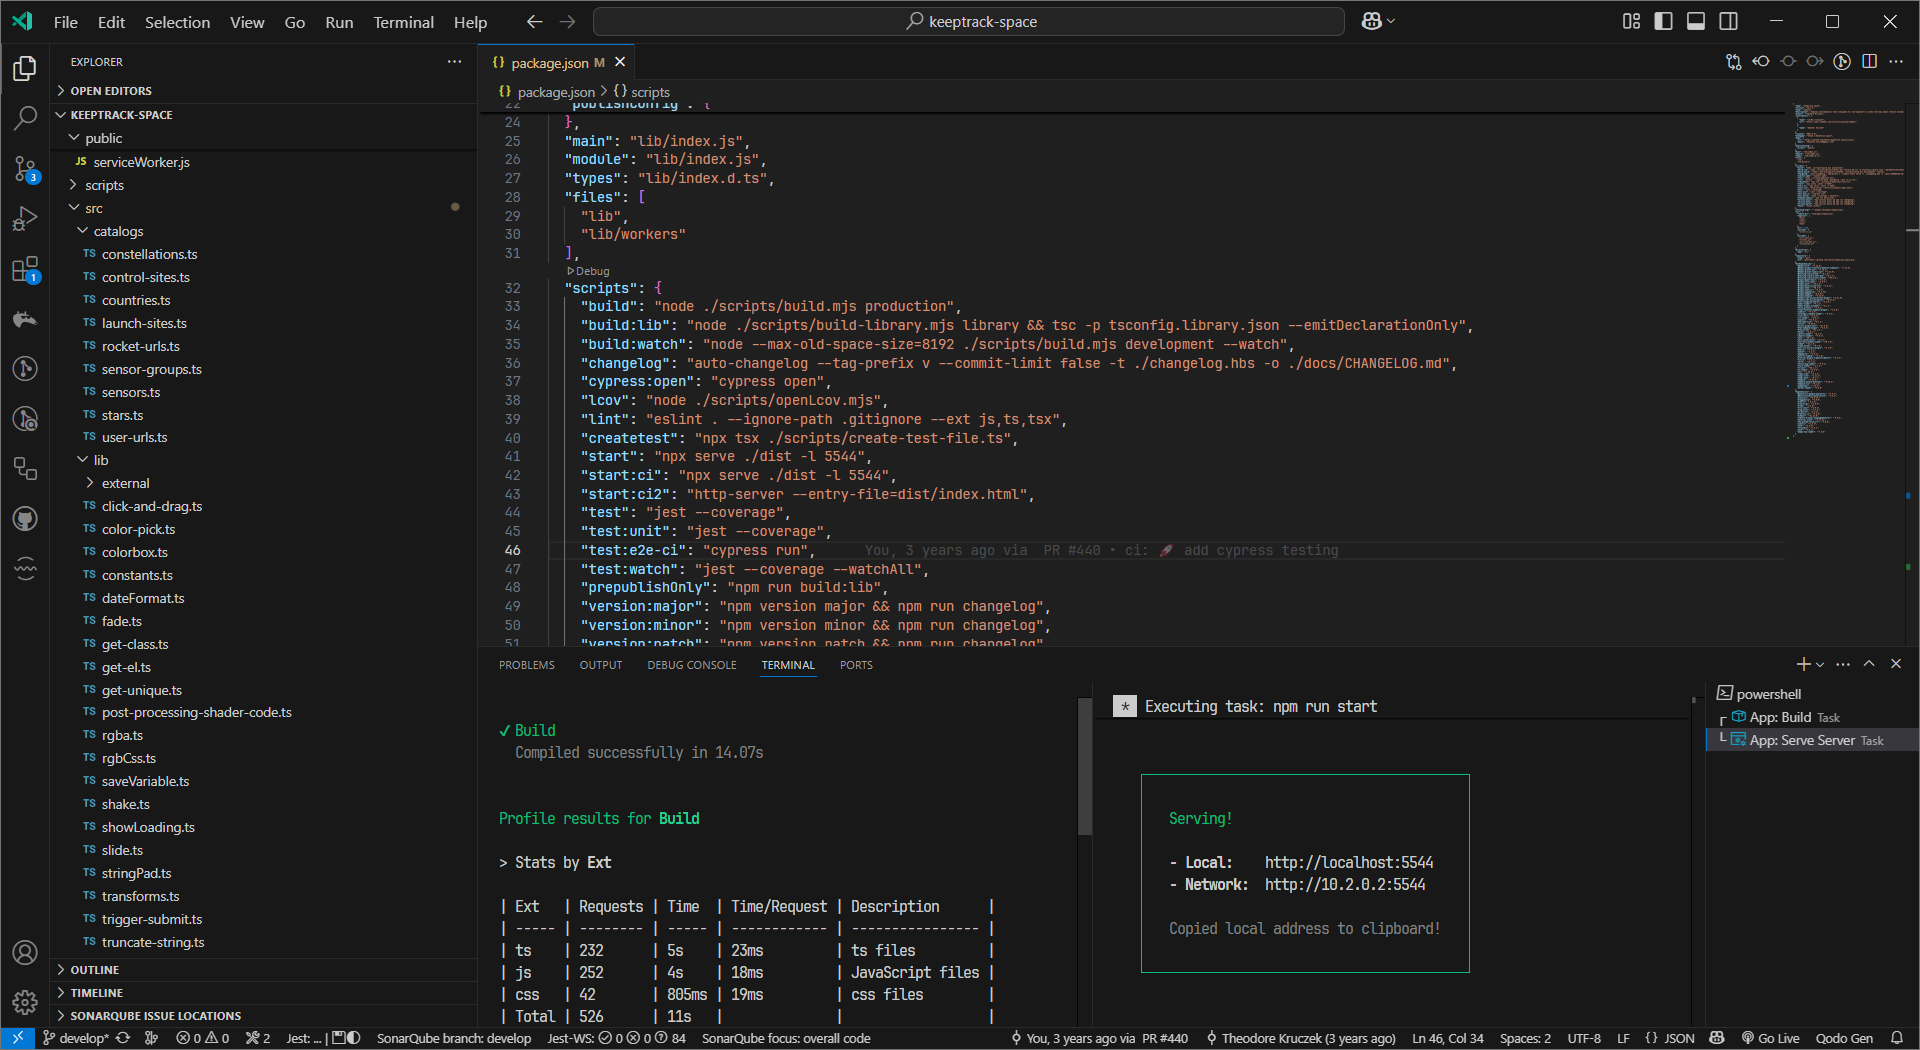
Open a terminal in VSCode (Terminal > New Terminal) and run:
npm run build:watchThis command converts all the TypeScript files into JavaScript in the /dist/ folder. The “:watch” part means webpack will continuously update the /dist/ folder as you make changes to your files.
Note: If you’re not planning to make changes and just want to run KeepTrack, you can use npm run build instead. This builds everything once for production. It’s faster, but won’t update automatically when you make changes, which makes debugging trickier.
Start the local server
Open a second terminal in VSCode and run:
npm run startThis uses the serve package to create an HTTP server at http://localhost:5544 that will serve your local version of KeepTrack.
Open your browser
Navigate to http://localhost:5544, and voilà! You should see KeepTrack running locally on your machine.
Troubleshooting Common Issues
”Cannot find module” errors
If you see these errors after running npm run build:watch, verify that you ran npm install and it was successful.
Browser shows “This site can’t be reached”
Make sure your server is running with npm run start and check that the /dist/ folder exists with files in it.
Verify that you have the correct port number. http://localhost is different than http://localhost:5544
Verify that serve is using the standard port (5544). If you have something else running on that port it will automatically issue a new port number.
Verify that you are using http and not trying to use https. Https will not work on your local machine without additional configuration (outside the scope of this tutorial).
Changes not reflecting in the browser
KeepTrack does not utilize hot-loading where the browser automatically updates after changes are made. This is not possible due to the high amount of client code and no active server. After each update, you must refresh the browser to see the changes reflected.
If that does not work, try hard-refreshing your browser (Ctrl+F5 or Command+Shift+R) to clear the cache. This is usually not an issue with a localhost server.
Making Changes to KeepTrack
With everything set up, you’re now ready to start exploring and modifying the code! Here’s a quick overview of what happens when you make changes:
- Edit any TypeScript file in the project
- The
build:watchcommand automatically compiles your changes to the/dist/folder - Refresh your browser to see the changes
Remember to keep both terminals running—one for the TypeScript compiler and one for the local server.
Next Steps
Now that you have KeepTrack running locally, you might want to:
- Explore the codebase to understand how it works
- Make small changes and see their effects
- Check out the GitHub repository for documentation
- Consider contributing to the project if you find ways to improve it
Happy coding! If you run into any issues or have questions, feel free to raise an issue on the GitHub repository or reach out to the community.

Theodore Kruczek


